j2Store Setup Guide
This is a step by step guide to integrating Nochex with your j2Store website.
Customers are always recommended to back up their code before making any significant changes, such as the ones detailed in this document.
Installation Instructions
-
Firstly make sure you have downloaded the module files, which can be found here.
-
Extract the Nochex_Module_J2Store.zip Archive.
-
Go to the location of your website files for Joomla on your server, using a file manager or ftp like FileZilla.
-
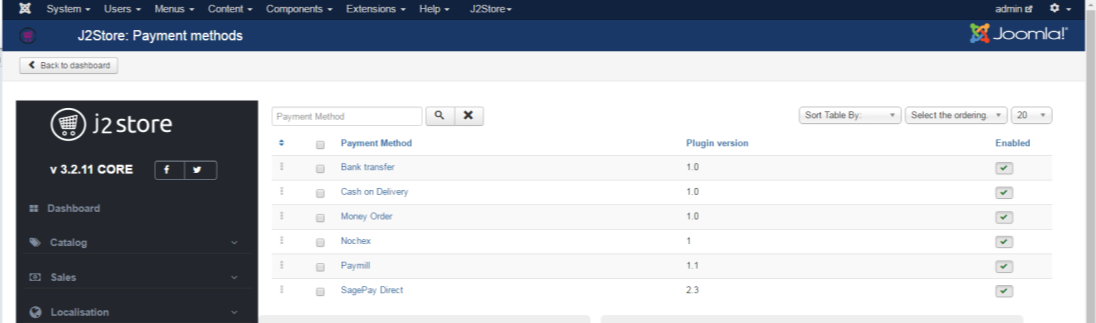
Once Completed, Login to your Joomla Administrator account and go to the payment section located here: J2Store > Setup > Payment Methods
-
Next Click on the Nochex Payment Option (If this option is not shown, please see Troubleshooting)
-
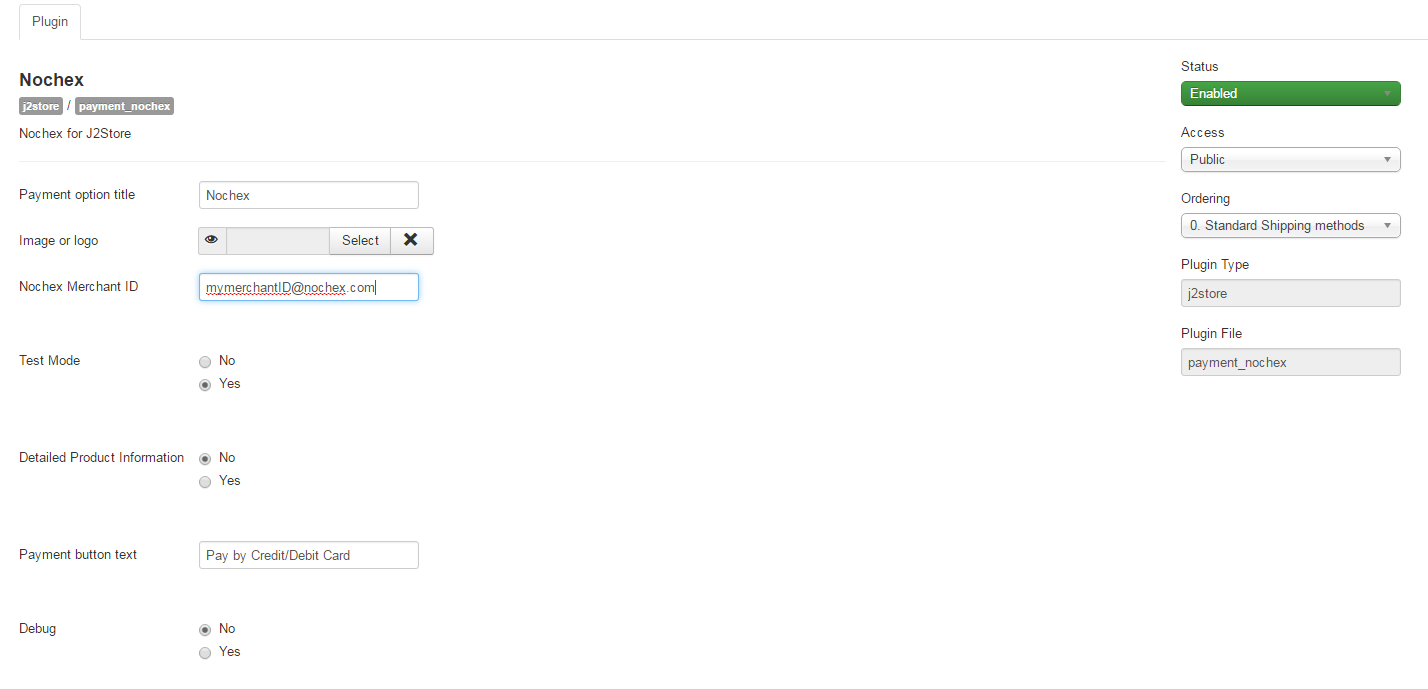
Enter your Nochex Merchant Email Address / Account Alias into the box labelled: Nochex Merchant ID, and to test the module select Yes on the test mode option. There are extra features: Debug Mode, Detailed Product Information (Select Yes to enable the feature) Note! For making live transactions change the test mode option to No.
-
Press Save
-
Finally go through the checkout process to ensure the Nochex module has been integrated correctly.
Troubleshooting
Problem
I have successfully added the Nochex files, and no errors are being shown in my error logs or in Joomla, but unable to see Nochex in the payment methods, or have got to Step 4 in our guide and Nochex is not available.
Solution
-
Login to your Joomla Administrator Panel, and go to the Discover Section located: Extensions > Discover
-
The Nochex Module may appear in this section, enable and install the plugin.
-
Once successful, go to step 4 and try re-enabling the Nochex module in your J2Store.