Magento Setup Guide
This is a step by step guide to integrating Nochex with your Magento website.
Customers are always recommended to back up their code before making any significant changes, such as the ones detailed in this document.
Magento Installation Instructions
-
Firstly make sure you have downloaded the module files located here.
-
Extract the Magento2_Nochex_Module.zip archive.
-
Copy the files and folders from the archive to the corresponding Magento folders on your web server. You can use FTP for this process.
-
Next run the following commands on your web server, to install our module on to your Magento:
php bin/magento setup:upgrade
php bin/magento setup:di:compile
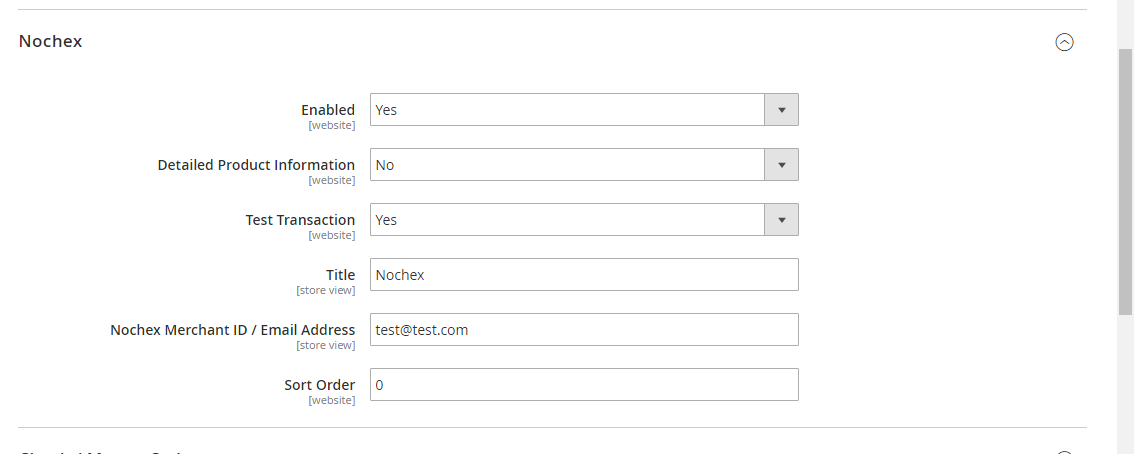
- Next, Login to your Magento admin. Go to Stores > Configuration and on the left-hand side menu select Sales > Payment Methods. There should be a Nochex payment option now available, fill in all the relevant details.
-
To test the Nochex payment option complete a test transaction. Change the Test Transaction option from No to Yes. When you are ready to start accepting payments Change the Test Transaction Option to No.
-
Save Changes, and this will prompt you to refresh your cache, click on the cache management link or go to System > Cache Management:

- Next, Flush your Magento Cache.
Finally go through the checkout process to make sure everything is working correctly.