Simple Memberships Setup Guide
This is a step by step guide to integrating Nochex with your Simple Memberships website.
Customers are always recommended to back up their code before making any significant changes, such as the ones detailed in this document.
Simple Memberships Installation Instructions
-
First you must have Simple Membership installed and setup on your website, as well as downloaded the latest version of the Nochex Module from our GitHub here.
-
Download and extract the downloaded Nochex Module for Simple Membership.
-
Make sure you have made a full backup of your website files just in case anything goes wrong. Then copy all of the files from the extracted archive to the corresponding WordPress folders on your web server. (Excluding the .txt files ) FTP or a File manager can be used for this process.
-
Go to and open each text file, for example: classes > class.swpm-init-time-tasks.txt, each file contains instructions on adding a line or section to a corresponding page in your web server.
-
Once changes have been made, make sure all files have been saved.
-
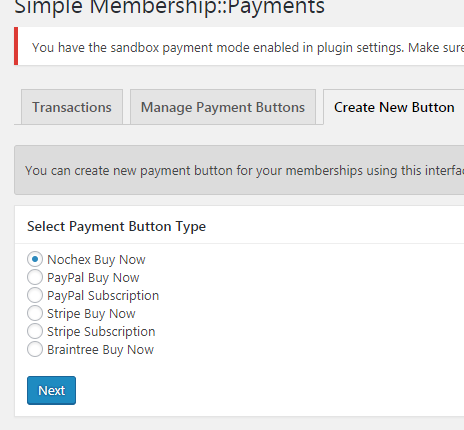
Login to your WordPress admin section and go to WP Membership > Payments > Create New Button.
-
Select Nochex Buy Now button and press Next.
-
Next fill out the form with the relevant information
- (Optional) Button Title
- (Required) Membership Level - Select the membership that you want customers / members to buy.
- (Required) Membership Type - New / Current Members
- (Required) Payment Amount - The amount members should pay for their membership.
- (Optional) Payment Currency - Select the appropriate currency.
- (Required) Return URL - This is the page which your members will return to after making a payment.
- (Required) Nochex Email Address or Merchant ID - Your registered Nochex email address / merchant ID.
- (Optional) Button Image URL - A link to a button image.
-
Save Payment Data and you will have created a new payment button.
-
Attach the button to your website and make a test transaction to make sure everything is working correctly.