WooCommerce Setup Guide
This is a step by step guide to integrating Nochex with your WooCommerce website.
Customers are always recommended to back up their code before making any significant changes, such as the ones detailed in this document.
WordPress Installation Instructions
-
Login to your WordPress admin area of your website;
-
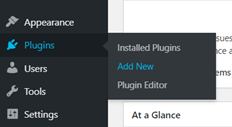
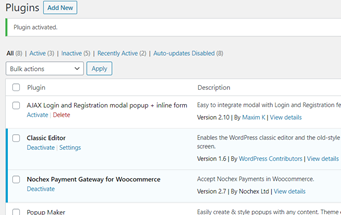
Go to Plugins > Add New;
- Next, search for the Nochex module;
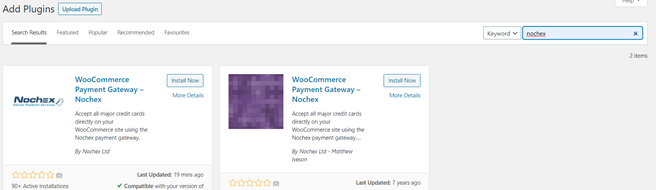
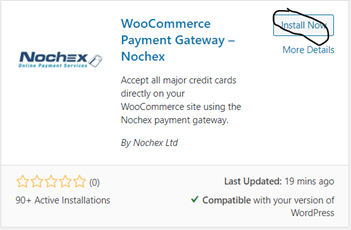
- . Next press the Install button on the Woocommerce Payment Gateway - Nochex module with the Nochex Logo and most recently updated;
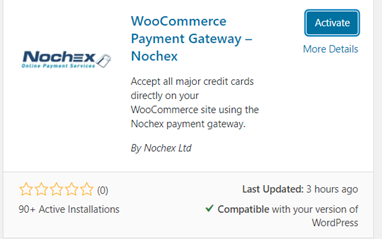
- Once installed, the button will change to a blue activate button;
Once activated, you will be redirected to your list of plugins;
- Go to WooCommerce > Settings
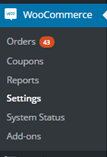
- Click the Payments tab, then Nochex
![]()
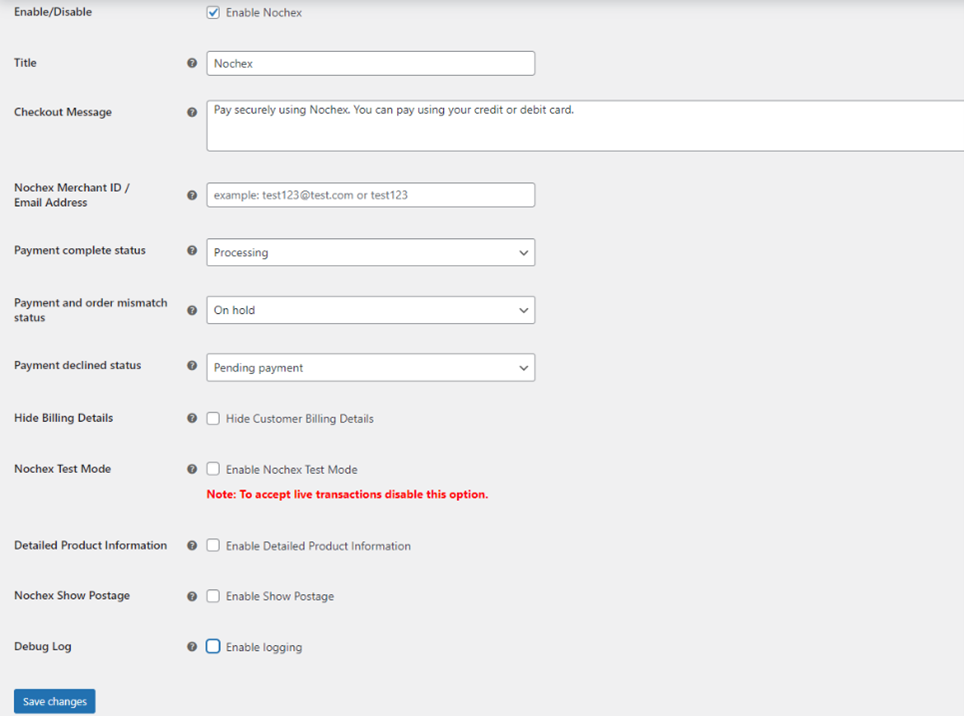
- Fill in all the necessary details, ensure the Enable Nochex box is checked and that your Nochex email address / merchant ID has been entered correctly and click Save Changes;
-
To test the Nochex plugin check the Enable Nochex Test Mode box and complete a test transaction. Always remember to uncheck the Enable Nochex Test Mode box when you want to start accepting live payments.
-
From the Nochex settings page you are also able to change status' assigned to an order using the "Payment complete status", "Payment and order mismatch status" and "Payment declined status" dropdown options.
Manual Installation Instructions
-
Firstly you must have the WooCommerce plugin installed into WordPress
-
Downloaded the latest module files, which can be found here.
-
Go to the Nochex Github, and click on the 'Woocommerce-nochex-payment-gateway.zip' link
-
Next, press the Download button to copy the module.
-
-
Login to your WordPress admin area.
-
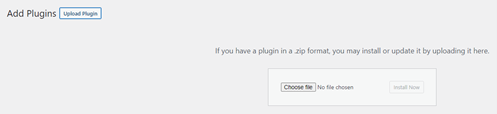
Go to Plugins > Add New
- Click the Upload Plugin, then press the Choose file button and find your recently downloaded Nochex plugin. Select the file and click Open.
-
Click Install Now
-
After the plugin has been installed successfully, click Activate Plugin
-
Go to WooCommerce > Settings
- Click the Payments tab, then Nochex
![]()
- Fill in all the necessary details, ensure the Enable Nochex box is checked and that your Nochex email address / merchant ID has been entered correctly and click Save Changes
-
To test the Nochex plugin check the Enable Nochex Test Mode box and complete a test transaction. Always remember to uncheck the Enable Nochex Test Mode box when you want to start accepting live payments.
-
From the Nochex settings page you are also able to change status' assigned to an order using the "Payment complete status", "Payment and order mismatch status" and "Payment declined status" dropdown options.