Virtuemart Setup Guide
This is a step by step guide to integrating Nochex with your Virtuemart website.
Customers are always recommended to back up their code before making any significant changes, such as the ones detailed in this document.
Virtuemart 4.0.6 Installation Instructions
-
Firstly you must have Joomla and VirtueMart installed and configured on your website!
-
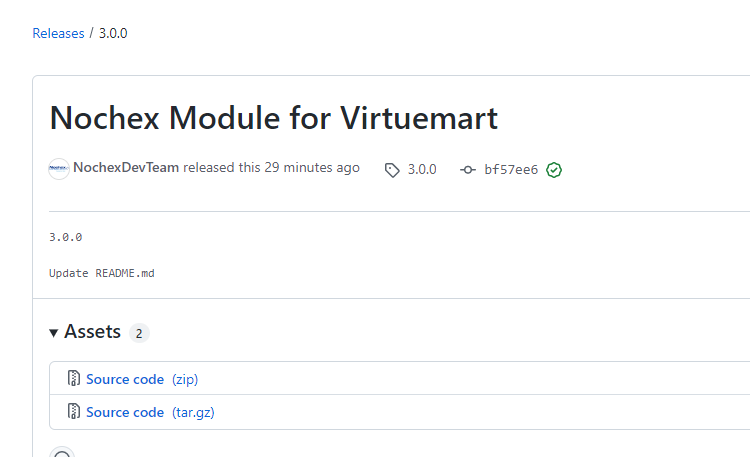
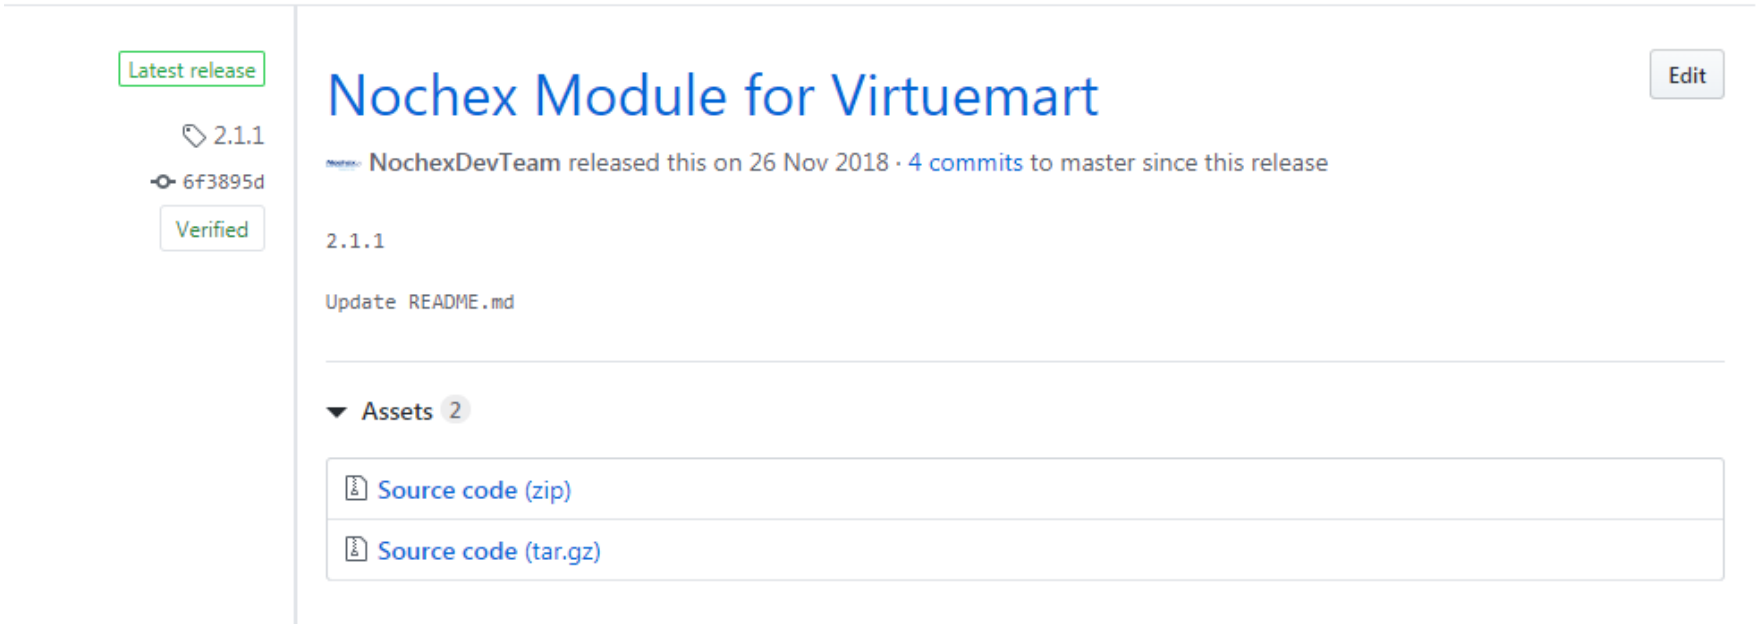
Download the latest module files, which can be found here.
-
Go to the Nochex GitHub, and click on the ‘Source Code (zip)’ link
-
This will download a copy of the Nochex module
-
Go to the downloaded module, and extract the module files;
-
-
Copy the extracted module files to the corresponding Joomla folders on your web server. You can use FTP for this process or a File Manager.

-
Login to your Joomla admin area
-
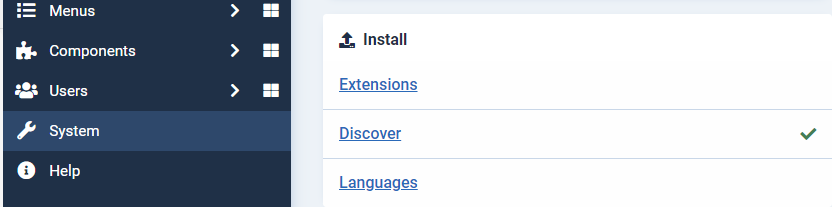
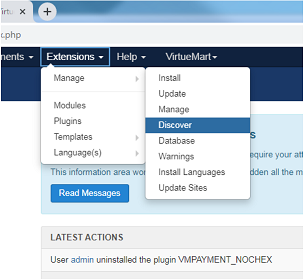
Go to System > Install > Discover
-
This will show your Nochex module

If your Nochex plugin does not show, please check your module files have been uploaded correctly.
-
Click the checkbox next to VMPAYMENT_NOCHEX or Nochex

-
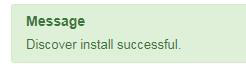
Press the Install button, to install the Nochex Module.

-
Once installed, a successful message will be shown.
-
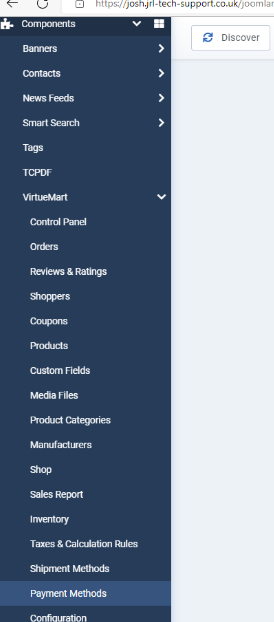
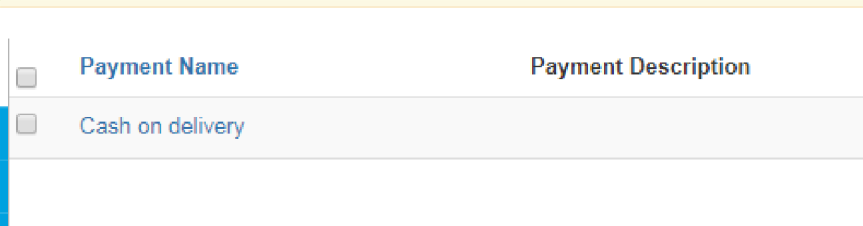
Next, Go to Components > VirtueMart > Payment Methods
-
This will show your VirtueMart payment methods
-
Press New button to add a new payment method

-
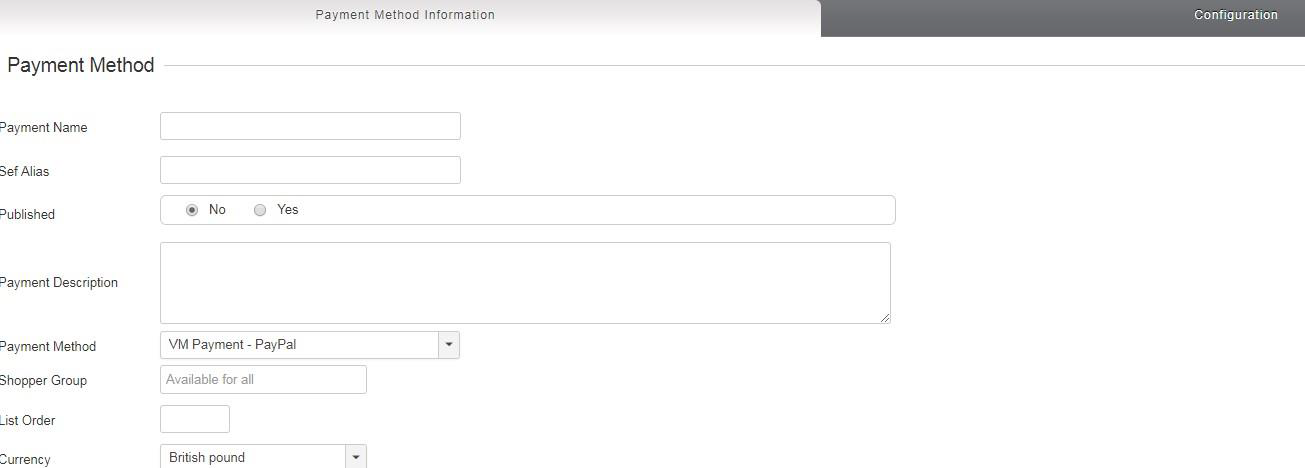
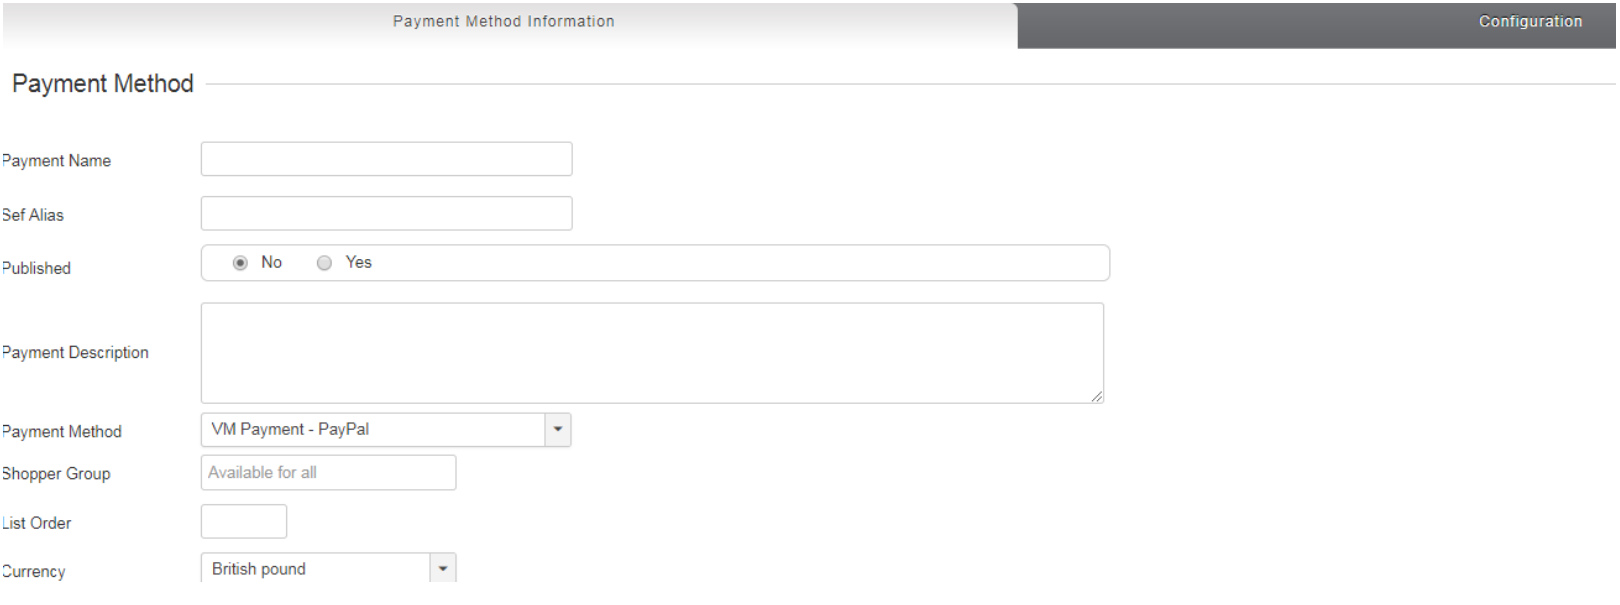
This will load the following;
-
Enter the following into each of the above fields
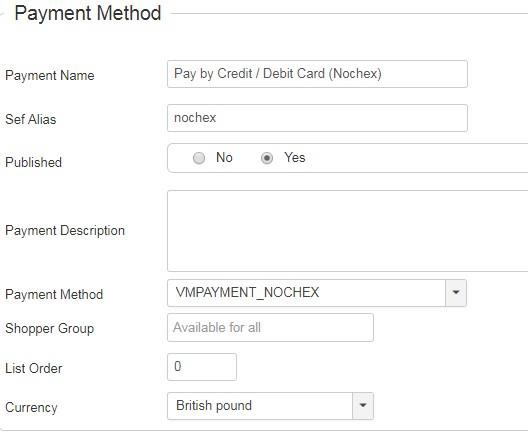
- Payment Name (Required) – Nochex
- Sef Alias (Required) – nochex
- Published (Required) – Yes
- Payment Description (Optional) – Can be left blank
- Payment Method (Required) – VMPAYMENT_NOCHEX
- Shopper Group – leave blank
- List Order (Optional) - 0
- Currency (Required) – British Pound
-
Once complete, save all changes

-
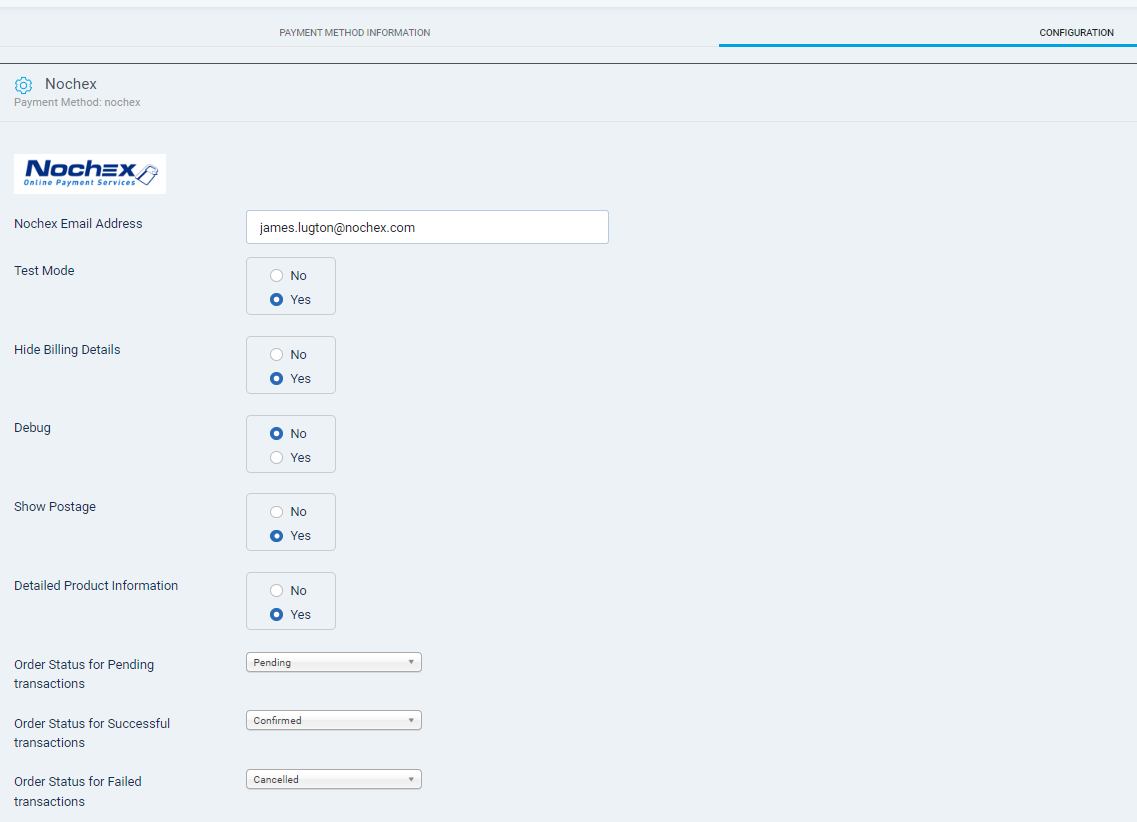
Once saved, click on the grey configuration tab to show your module settings

-
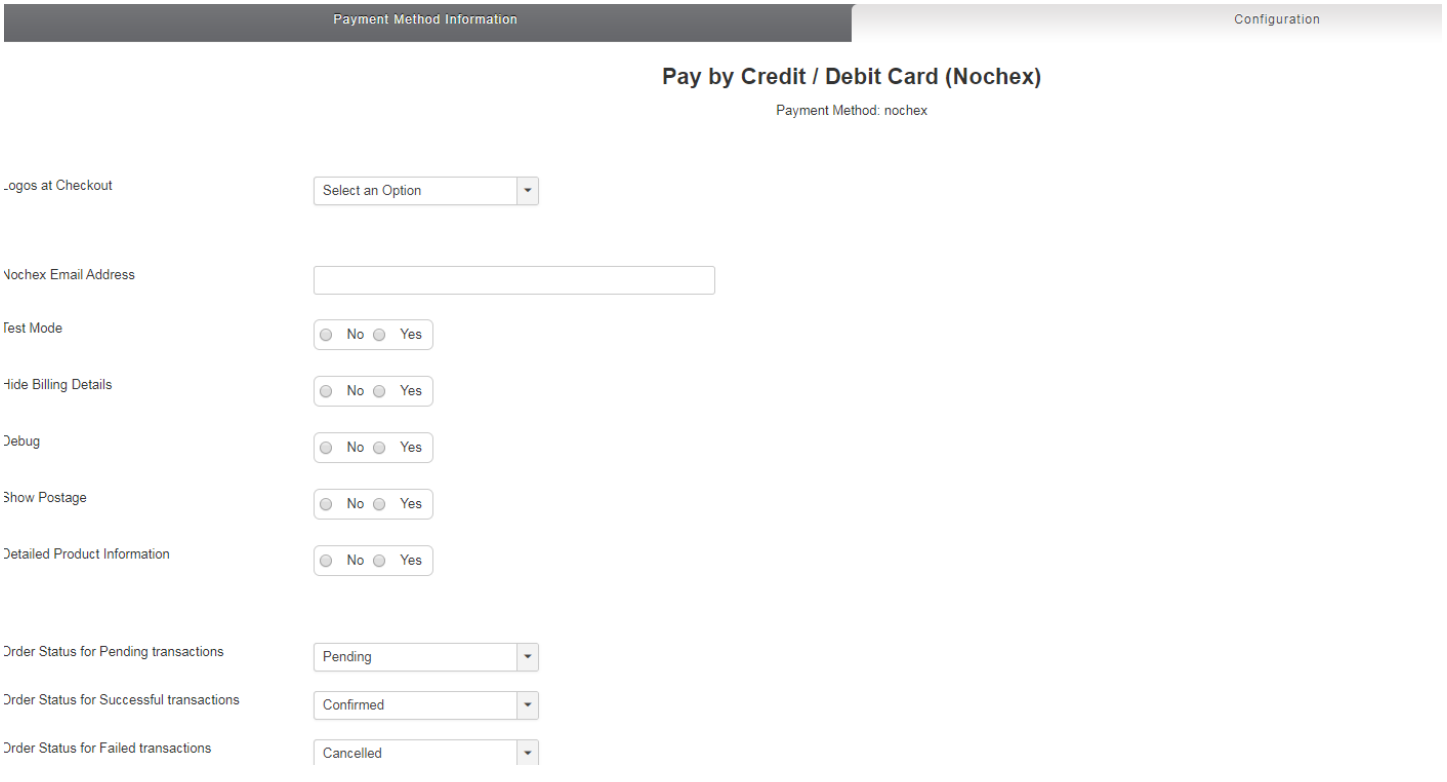
This will show the following;
-
Complete all of the relevant settings;
-
Logos at Checkout – Logos / Images you would like to display on the checkout page (Required)
-
Nochex Email Address / Merchant ID – Your Nochex Merchant ID / Email address, for example: you@yourbusiness.com (Required)
-
Test Mode – To check if everything is working. After you have found that everything is working, remember to put the status to Live Mode, otherwise no money can be accepted.
-
Hide Billing Details – To hide billing details.
-
Show Postage – Show Postage on your Nochex account
-
Detailed Product Information – Display products in a structured and detailed format on your payment page
-
Order Status for Pending transactions – Status for pending transactions (Required)
-
Order Status for Successful transactions – Status for successful transactions (Required)
-
Order Status for failed transactions – Status for failed transactions (Required)
-
-
Save all changes
-
Go through the checkout process to make sure the module has installed and setup correctly.
Once you have gone through the entire process as a customer you will receive payment notifications, and an updated order will be visible in your VirtueMart along with payment information
cautionRemember: Disable Test mode in your Nochex Module once you are ready to accept live transactions
Virtuemart 3.x Installation Instructions
-
Firstly you must have Joomla and VirtueMart 3 installed on your website.
-
Download the latest module files, which can be found here.
- Go to the Nochex GitHub, and click on the 'Source Code (zip)' link
- This will download a copy of the Nochex module
- Go to the downloaded module, and extract the module files;
- Go to the Nochex GitHub, and click on the 'Source Code (zip)' link
-
Copy the extracted module files to the corresponding Joomla folders on your web server. You can use FTP for this process or a File Manager.

- Login to your Joomla admin area
- Go to Extensions > Management > Discover
- This will show your Nochex module

-
Click the checkbox next to
VMPAYMENT_NOCHEX -
Press the install button, to install the Nochex Module.
![]()
- Once installed, a successful message will be shown

-
Next, Go to VirtueMart > Payment Methods
-
This will show your VirtueMart payment methods
-
Press New button to add a new payment method
![]()
- This will load the following;
-
Enter the following into each of the above fields
- Payment Name (Required) - Nochex
- Sef Alias (Required) - nochex
- Published (Required) - Yes
- Payment Description (Optional) - Can be left blank
- Payment Method (Required) - VMPAYMENT_NOCHEX
- Shopper Group - leave blank
- List Order (Optional) - 0
- Currency (Required) - British Pound
-
Once complete, save all changes
-
Once saved, click on the grey configuration tab to show your module settings

- This will show the following;
-
Complete all of the relevant settings;
- Logos at Checkout - Logos / Images you would like to display on the checkout page (Required)
- Nochex Email Address / Merchant ID - Your Nochex Merchant ID / Email address, for example: you@yourbusiness.com (Required)
- Test Mode - To check if everything is working. After you have found that everything is working, remember to put the status to Live Mode, otherwise no money can be accepted.
- Hide Billing Details - To hide billing details.
- Show Postage - Show Postage on your Nochex account
- Detailed Product Information - Display products in a structured and detailed format on your payment page
- Order Status for Pending transactions - Status for pending transactions (Required)
- Order Status for Successful transactions - Status for successful transactions (Required)
- Order Status for failed transactions - Status for failed transactions (Required)
-
Save all changes
-
Go through the checkout process to make sure the module has installed and setup correctly
Once you have gone through the entire process as a customer you will receive payment notifications, and an updated order will be visible in your VirtueMart along with payment information.
Remember: Disable Test mode in your Nochex Module once you are ready to accept live transactions