Payment Page - Customisation
Why customise the Nochex Payments Pages?
You have successfully integrated the Nochex Payments Page with your website, but the redirect to the Payments Page is somewhat disjointed between the design of your website and that of the Payments Page. Customising the Payments Page allows you to offer a seamless transition in design. This not only gives your website a more professional look, it also instils confidence in your customers that yours is a reputable company.
Customisation allows you to:
- Enter your own Header and Footer HTML
- Edit Font types and colour
- Edit the Background colour
- Add your own Continue, Make Payment, Cancel and Start Again buttons
- Set your required Cancel, Success and Call Back URLs
- Add extra Merchant IDs
- Adapt for different devices.
This guide will illustrate the various parameters you can use to customise your payments page and also provides some examples of what can be achieved with this invaluable feature.
If you encounter any problems customising your payments page, we are here to help - just contact your Account Manager or our Help Desk!
Customisation Step-by-Step
-
Login to your Nochex account.
-
Next, click "Payments Page Setup".
-
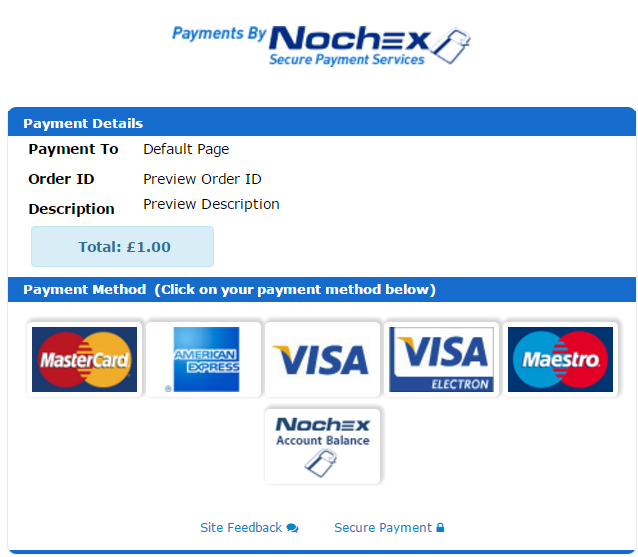
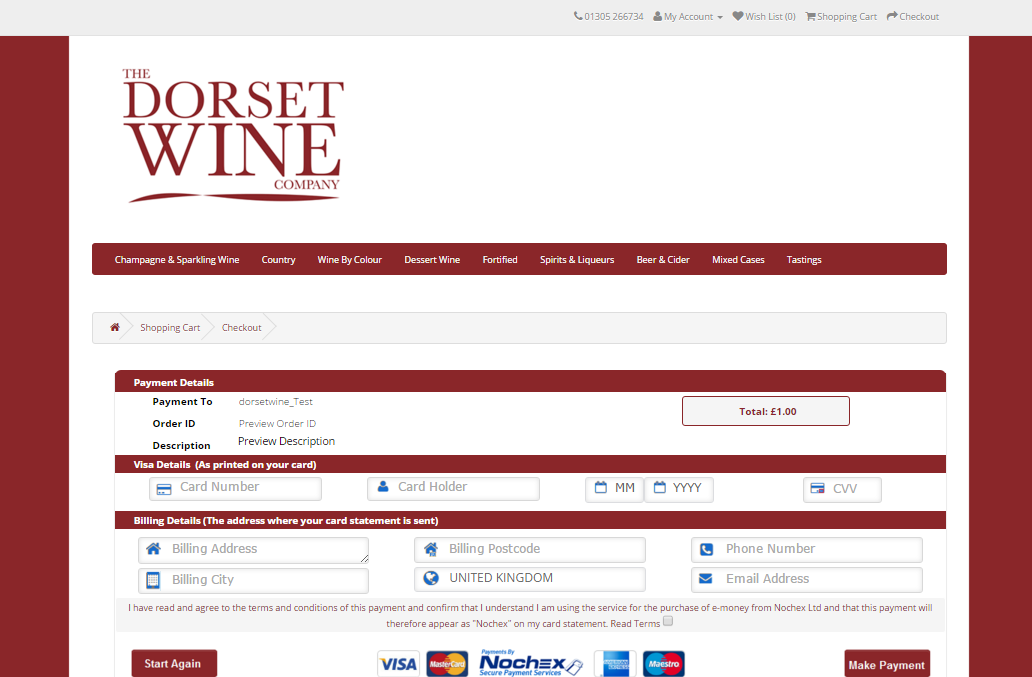
You will be taken to the following page.
-
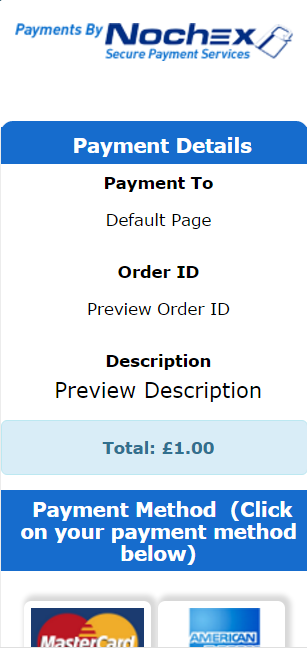
Select the Merchant ID from the drop down field that you want to customise.
If you have more than one website, you can add extra Merchant IDs to allow differing customisations. To add a Merchant ID click on the Merchant ID button.
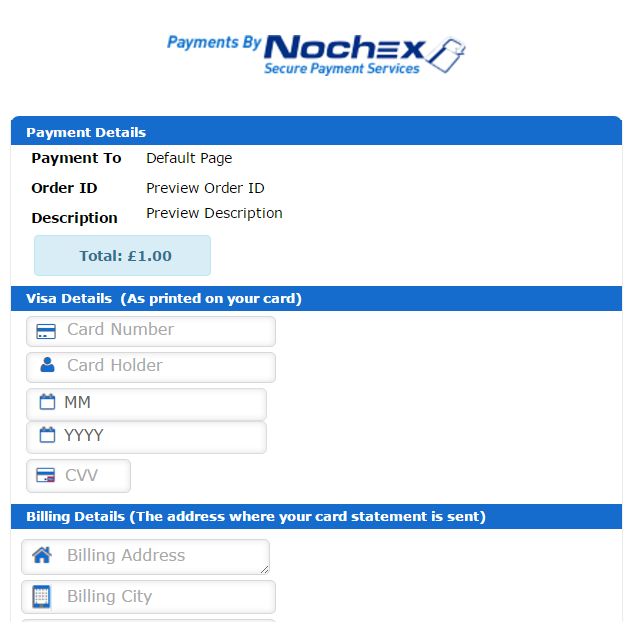
- Merchant ID: You should enter a word for example 'shop2'; email addresses are not accepted as IDs. NB: Letters, numbers, and underscores (_) only
- Merchant Description: This is the description which is displayed on the payment page.
-
Once you have made any changes to your Payments Page, you will need to save the changes. Once saved, your customers will see your customised Payments Page. You can click the Preview button to view any changes you have made.
Recommendations:
- Where possible, images should be hosted on a secure server (https)
- There is no limit to the size of the images, since they are served from your server; however if the file is unsecure it is loaded through our service which will take time for larger images
- If you are using a style sheet then you must either link to a securely hosted style sheet or alternatively embed the style sheet within the header HTML
Customisation Parameters
| Setting Name | Parameter | Name Description |
|---|---|---|
| Description | N/A | The brand name for your Merchant ID. This is what shoppers see when making payments. Your email address is the default. This facility allows you to change it to your company name. |
| Header HTML | header_html | The HTML that will be displayed before the Payments page HTML elements are displayed. This can be used to customise the Payments page to look like your web site. |
| Footer HTML | footer_html | HTML that will be displayed after the Payments page HTML elements are displayed. This can be used to customise the Payments page to look like your web site. |
| Font Name | font_name | The style of the font used on the Payments page. |
| Font Colour | fore_colour | The font colour used on the Payments page. |
| Background Colour | back_colour | The background colour used on the Payments page. |
| Continue Button | continue_button_image | The location of image used when displaying the "Continue" button on the Payments page. |
| Make Payment Button | makepayment_button_image | The location of image used when displaying the "Make Payment" button on the Payments page. |
| Cancel Button | cancel_button_image | The location of image used when displaying the "Cancel" button on the Payments page. |
| Start Again Button | startagain_button_image | The location of image used when displaying the "Start Again" button on the Payments page. |
| Close Window Button | closewindow_button_image | The location of image used when displaying the "Close Window" button on the Payments page. |
| Print Receipt Button | printreceipt_button_image | The location of image used when displaying the "Print Receipt" button on the Payments page. |
| Cancel URL | cancel_url | The URL your customer is directed to if they decide to cancel the payment. The cancel button is only shown on the Payments page if this parameter is set. |
| Call back URL | callback_url | The URL that Nochex will send a notification to once a successful payment is made. At this stage the APC functionality that you may currently use is unchanged. |
| Success URL | success_url | The URL your customer is directed to once the payment is successfully completed. |
| Auto Redirect | N/A | If this option is enabled then your customer will be automatically redirected to the Success URL once the payment is successfully completed. |
| Request Additional Customer Information (e.g. product colour) | ask_more_info | If this option is enabled then your customer will be asked for further information about the payment. |
| Request Delivery Address | N/A | If this option is enabled your customer will be asked to supply a delivery address with the payment. |
| Show Order ID | N/A | If this option is enabled your customer will be shown the Order ID (if supplied) on the Payments page. |
| Enable Consumer Email Payment Confirmation | N/A | Usually after a payment is made to your account the customer will get a payment confirmation email. If this option is disabled the customer will not receive a confirmation email. |
| Enable test transactions | N/A | If enabled this option allows test transactions to be made. |
| Set account into test mode | test_transaction | If this option is enabled no live transactions can be processed. |
Posting Customisation Parameters
It is possible to customise your Payments page by passing the HTML as part of a Form POST or Form GET rather than specifying the HTML in your Control Panel.
Form Example:
<form action="https://secure.nochex.com" method="post" >
<input type="hidden" name="merchant_id" value="nochex_test" />
<input type="hidden" name="amount" value="10.00" />
<input type="hidden" name="description" value="Online Order" />
<input type="hidden" name="fore_colour" value="#0066ff" />
<input type="hidden" name="font_name" value="Arial" />
<input type="hidden" name="back_colour" value="#0066ff" />
<input type="hidden" name="continue_button_image" value="https://secure.nochex.com/images/b1.gif" />
<input type="hidden" name="makepayment_button_image" value="ht tps://secure.nochex.com/images/b2.gif" />
<input type="hidden" name="cancel_button_image" value="https://secure.nochex.com/images/b3.gif" />
<input type="hidden" name="startagain_button_image" value="https://secure.nochex.com/images/b4.gif" />
<input type="submit" value="submit" />
</form >
If you pass the parameters as part of a Form, then this method will take precedence over any changes you have made from with your Control Panel.
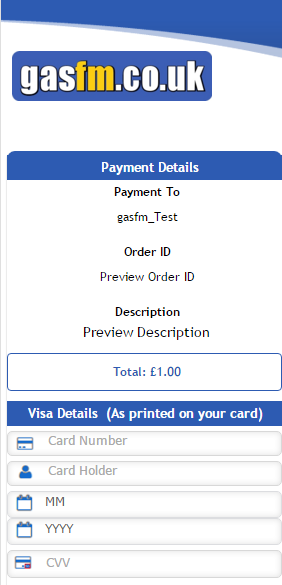
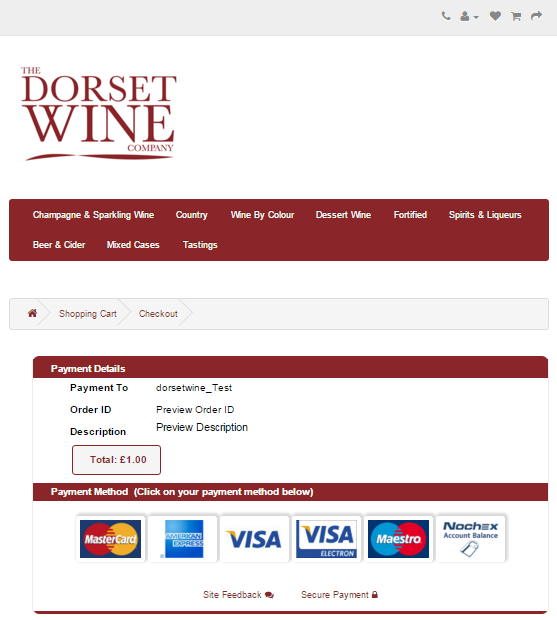
Device Optimised Nochex Payments Pages
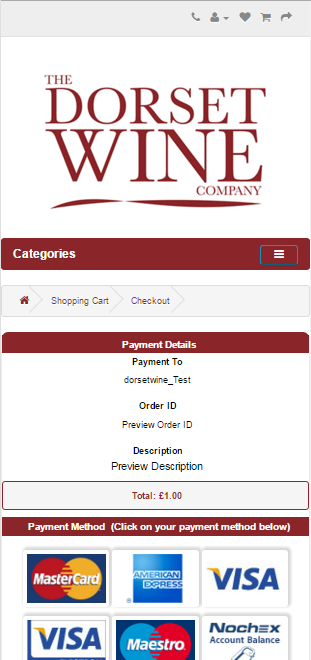
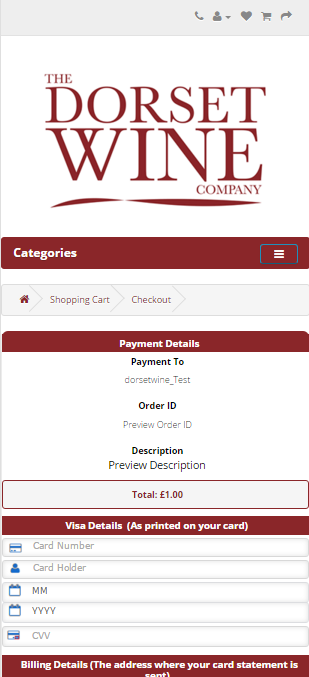
If a customer uses a mobile device, laptop, television, or tablet when making a purchase through your Nochex Payments Pages the style of the pages will change to an optimised version for that particular device.
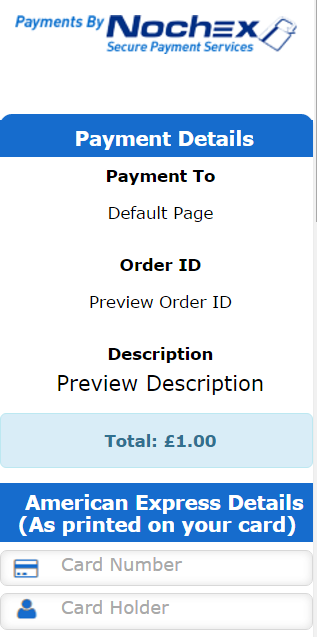
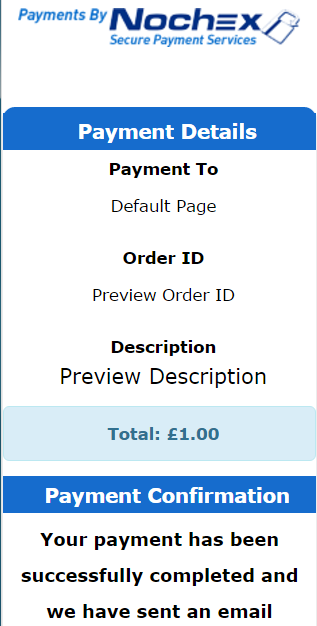
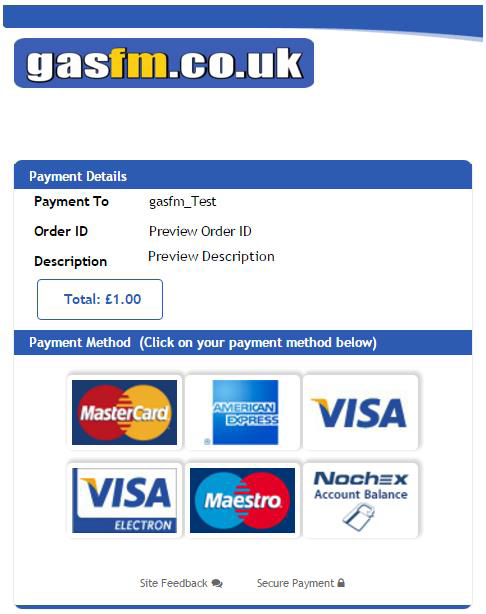
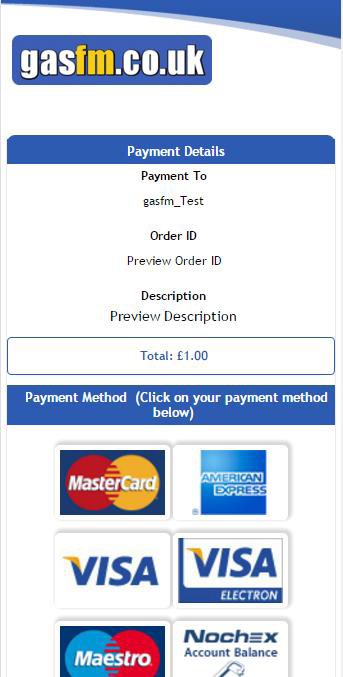
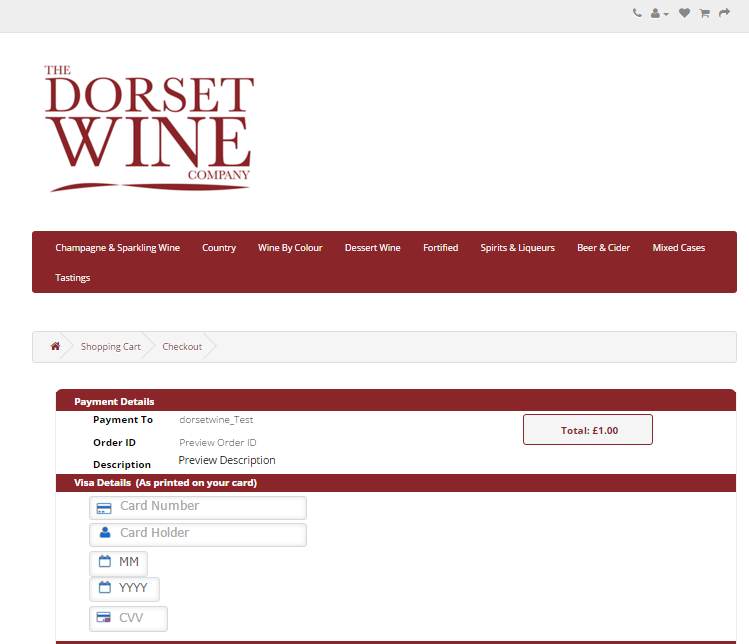
The images below reflect what the pages look like when viewed on a mobile device.
The images below; show what the pages look like when viewed on a tablet device.
Customisation Examples
Example 1
The easiest way to customise the Nochex Payments Pages is to change the logo which is displayed. To do this you just need to enter the location of your chosen image, where the text is highlighted in red below; for example change http://www.yourwebsite.com/images/header.gif
Header HTML:
<div class="container">
  <div class="col-md-12">
    <div class="row">
      <div class="col-md-12">
        <div style="text-align: center; margin-left: auto; margin-right: auto ;">
          <img src="https://secure.nochex.com/images/payments-by-nochex.png” border="0" alt="www.nochex.com" class="DefaultBanner">
        </div>
      </div>
    </div>
  </div>
  <div class="col-md-12">
    <div class="row">
Footer HTML:
    </div>
  </div>
</div>
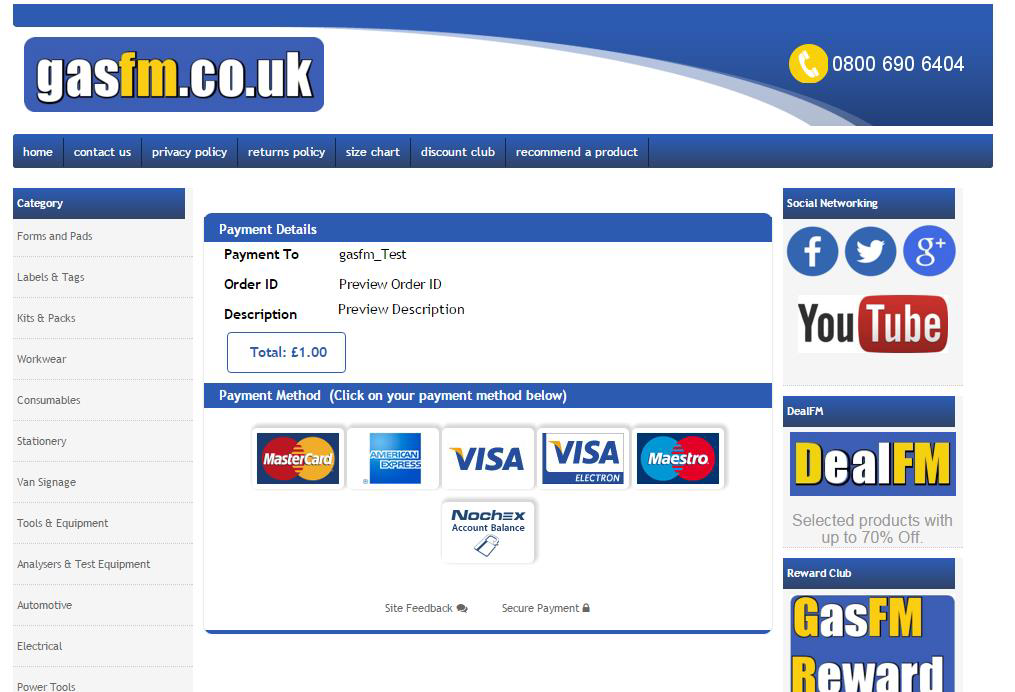
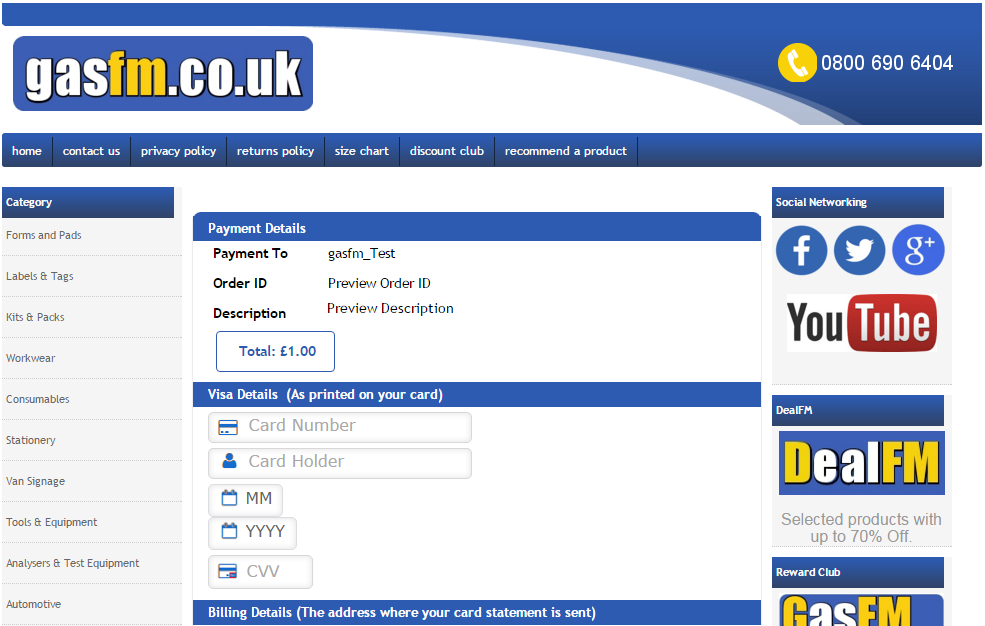
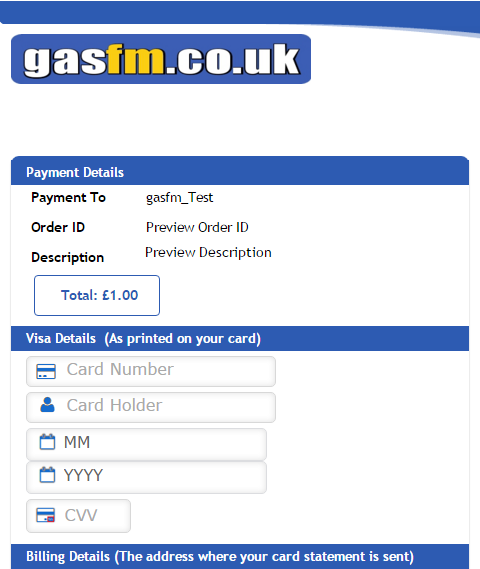
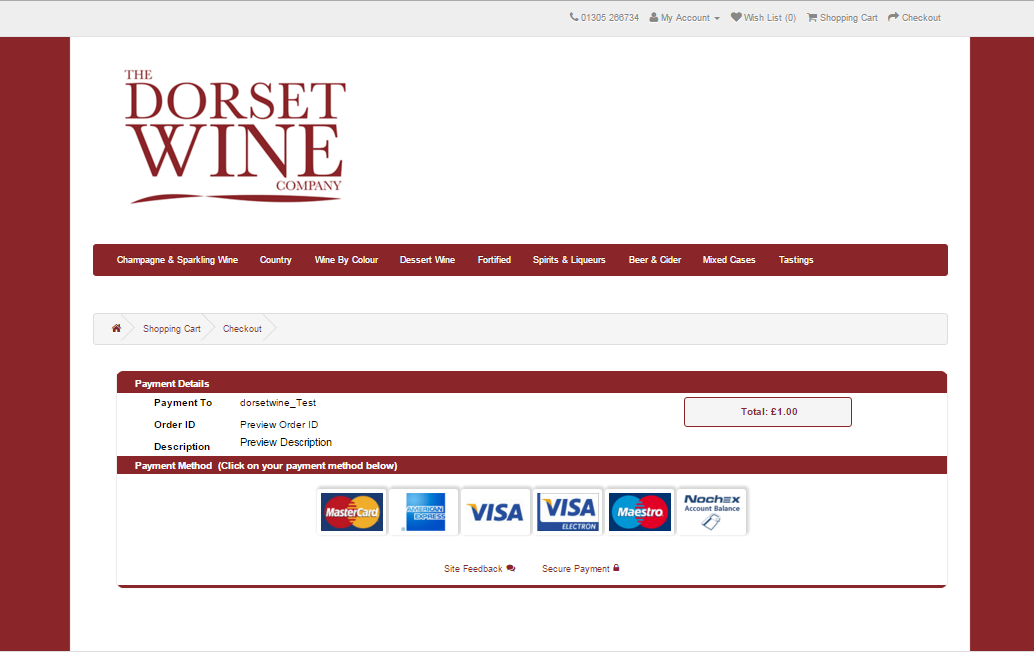
The result of the Header and Footer HTML above when viewed on the internet is as follows:
Example 2
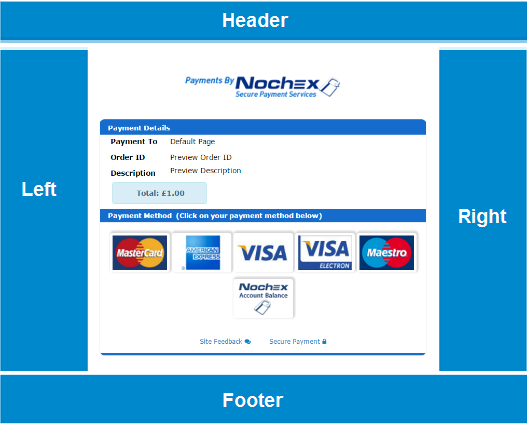
You can take the customisation further by not only adding your own header and footer graphics, but also specifying what is displayed on the left and right side of the Nochex Payments Pages.
Header HTML:
<--HEADER-->
<div class="col-md-12">
  <div style="text-align: center ;">
    <img src="https://secure.nochex.com/images/header.gif" border="0" alt="www.nochex.com" class="headerBanner"></a>
  </div>
  </div>
    <! -- LEFT OF CARDS -->
    <img src="http://www.yourwebsite.com/images/left.gif" alt="Alternative Text" />
Footer HTML:
<! -- RIGHT OF CARDS -->
<img src="http://www.yourwebsite.com/images/right.gif" alt="Alternative Text" />

<! -- FOOTER -->
<img src="http://www.yourwebsite.com/images/footer.gif" alt="Alternative Text" />
The result of the Header and Footer HTML above when viewed on the internet is as follows:
Live Example 1
Live Example 2
Troubleshooting
"My customisation looks fine on my computer and laptop, but on my phone the payments page doesn't fit my screen as shown in this guide or Nochex default page"
The possible reason your custom page does not display correctly on your phone is due to specific sizes or styles being set in order to display correctly on a desktop / larger screens.
Solution would be to use Media Queries to allow you to set certain screen sizes and set styles for those for example: Applying the following styles onto your payment page; would change the background colour on specific screen sizes.
<style>
body{
  background-color:lightblue;
}
@media(max-width:980px){
  body{
    background-color:blue;
  }
}
@media(max-width:650px){
  body{
    background-color:yellow;
  }
}
@media(max-width:480px){
  body{
    background-color:orange;
  }
}
</style>