Nochex Invoicing Feature
A step by step guide: how to use the Nochex Invoicing Feature.
Create and Send Invoices
To create a new invoice you will need to login to your Nochex account, and select the Invoices tab at the top of your Nochex account, and press Create Invoice. This will produce an invoice form for you to complete and create an invoice, similar to the screen below;
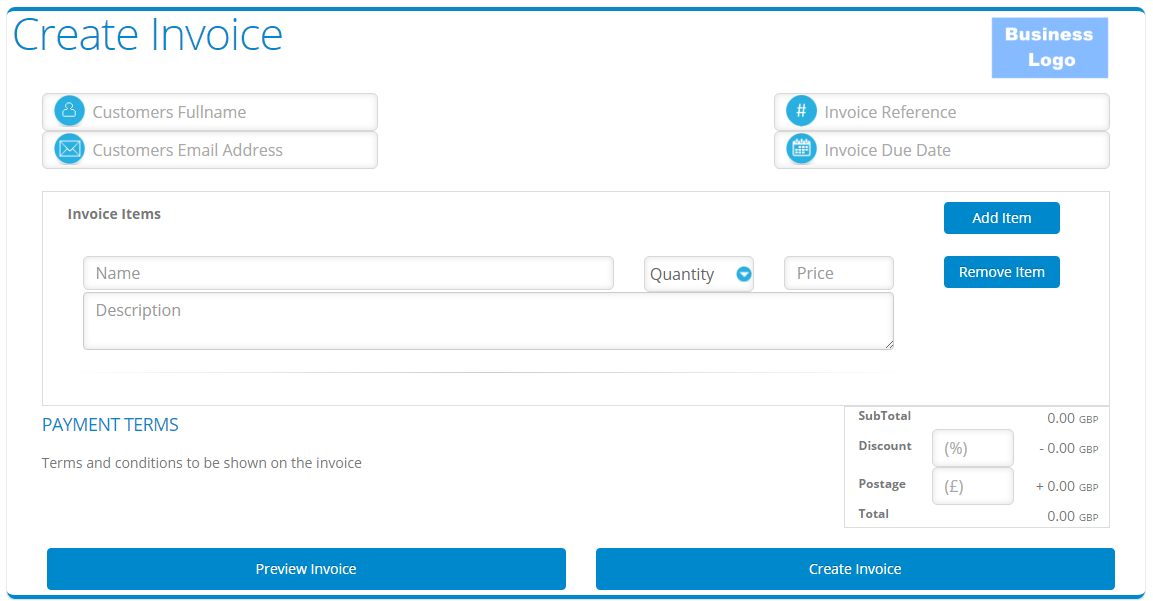
To create a complete invoice fill in the Customers full name and Email Address, Invoice Reference (this can be anything you like), Invoice Due Date, Invoice Items Details (Name, Quantity, Price and Description), Invoice Due Date, and Reference. Optionally you can add a Discount (percentage 1% to 99%) and Postage cost.
If you’d rather simply request a payment without completing all the fields you can only input the customer e-mail address and the amount which are the only mandatory fields, and press send. This is similar to the old “Request Money” feature but with the added benefit of recording received payments and the ability to send reminders.
When all or some of your invoice fields have been completed it is possible to preview how the invoice will look to your customer by selecting the preview invoice button which will show something like the following:
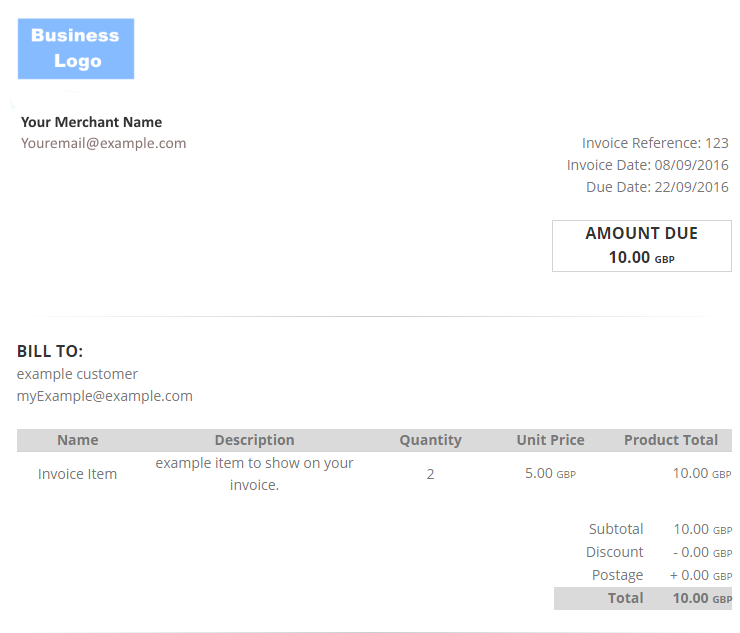
Once the invoice is ready, press the create invoice which will process your invoice. Your customer will receive a copy of your invoice, and you will receive an email confirmation of your new invoice. The new invoice will added to your list of invoices.
How do customers make payments for my invoice?
Whether you have sent a new invoice to a customer or sent them a reminder the email they receive contains a brief summary and a pdf copy of your invoice. In both the summary and pdf contains a payment button which the customer presses and sends them to an invoice payment page.
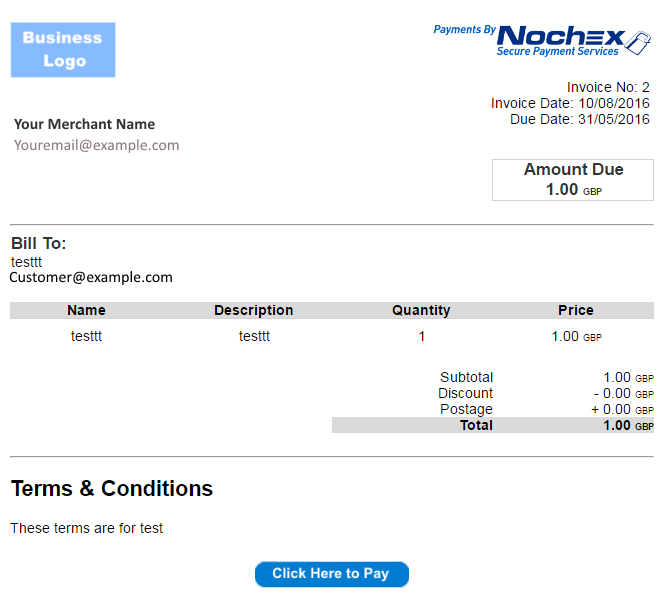
Once the customer has been sent to the invoice payment page, the customer can check the invoice details and then press Click Here to pay which will redirect the customer to your merchant payment page to carry out the payment. Once the payment has been complete the invoice will be updated to paid, and an email confirmation is sent to you and your customer.
View Invoices
To View your invoices you will need to login to your Nochex account, and select the Invoices tab at the top of your Nochex account. This will produce a list of your invoices which will be shown in a table like the following:
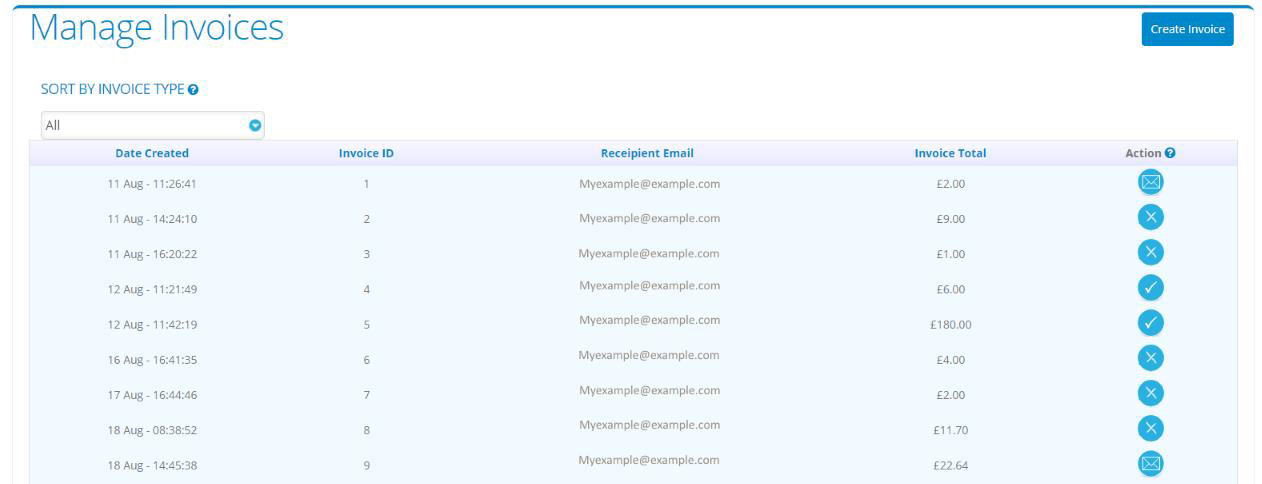
Invoices in the table show brief information about an invoice; Date the invoice was created, the invoice id; customers email address, the invoice total, and an action or status of the invoice which is displayed. For further details click on an invoice or click on a particular action for more details.
Actions available
-
 Unpaid invoice - This action is shown if an invoice has not been paid by the customer or you have not cancelled the invoice.
Once you have clicked the unpaid button you will see the following screen:
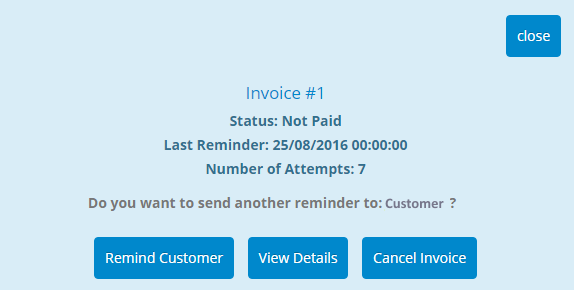
The above screen shows an example of the details shown for your invoice, current status of this invoice is Not Paid, the last reminder to the customer was sent, and has been reminded 7 times. There are further actions that can be taken.
-
Remind the Customer - This action allows you to remind a customer if they have not paid for their invoice yet, and it is due soon. Once you have selected this option, you and your customer will receive an email notification, and your invoice will be updated to show how many times you have reminded the customer and when the last reminder was sent.
-
View Details - You will be sent to an invoice page which will display all the details of your recently created invoice.
-
Cancel Invoice - This action allows you to cancel an invoice that you no longer need the customer to pay. This will send a notification to you and your customer, and the invoice will be updated to show it has been cancelled as well as when it was cancelled.
-
-
 Paid invoice - This action is shown if an invoice has been successfully paid by the customer. You will have also received a Nochex Payment Confirmation emails, and a transaction shown in your transaction history to correspond with this invoice.
Once you have clicked this action you will see the following screen:
Paid invoice - This action is shown if an invoice has been successfully paid by the customer. You will have also received a Nochex Payment Confirmation emails, and a transaction shown in your transaction history to correspond with this invoice.
Once you have clicked this action you will see the following screen: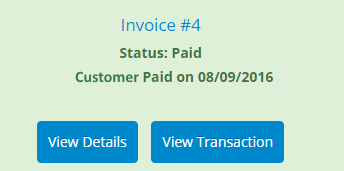
The above screen shows an example of a paid invoice, which shows the invoice is paid and when the customer paid for the invoice. There are further actions that can be taken;
-
View Details - you will be sent to an invoice page which will display details of your recently paid invoice.
-
View Transaction - you will be sent to the corresponding transaction in your transaction history
-
-
 Cancelled invoice - This action is shown if you have cancelled an invoice that you no longer needed the customer to pay. You will have also received an email informing you and the customer of the invoice cancellation.
Once you have clicked this action you will see the following screen:

The above screen shows an example of a cancelled invoice, which shows the status cancelled, and date in which the invoice was cancelled
-
 Issue with a particular invoice - This action is shown if the customer has successfully made a payment for your invoice but something happened in the process. If you have this icon shown please contact customer support
To view a certain type of invoice list; paid, unpaid, cancelled, or all invoices. Select the invoice type from the following dropdown list.

For example, select to sort and show a list of paid invoices;

Invoice Settings
To add your own business logo and terms, you will need to login to your Nochex account, select the invoices tab at the top of your Nochex account, and press Invoice Settings. This will load your settings page, similar to the screen below;
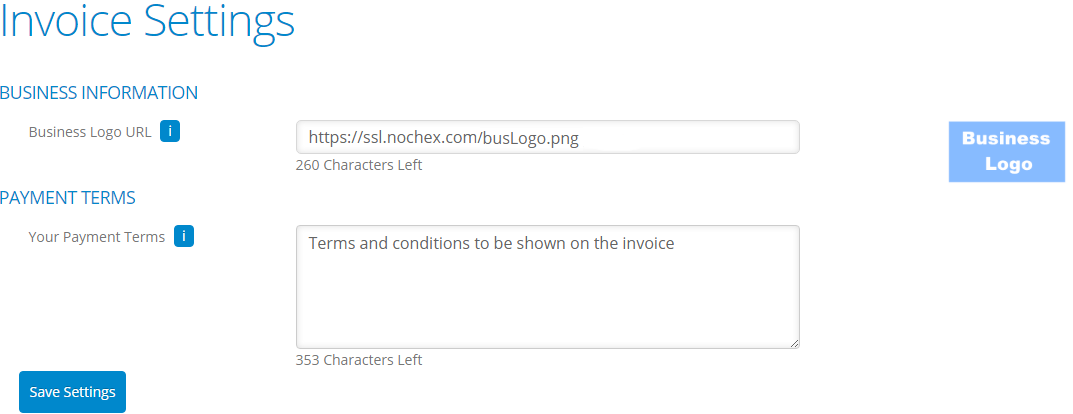
To add your own logo, replace the URL in the Business Logo URL field with the URL to your own logo.
Make sure this logo is secure and uses https:// otherwise you logo won’t show on your invoices. If your logo is unsecure contact support as we may be able to host the logo for you.
To add your own terms, replace the / add text into your payment terms field with a copy of your payment terms.
Once the above fields have been changed press save settings, and this will update your invoice logo and payment terms. To check your details have updated successfully, go to create invoice and see if your new logo and terms are visible.