ZenCart Setup Guide
This is a step by step guide to integrating Nochex Widget API with your ZenCart website.
Customers are always recommended to back up their code before making any significant changes, such as the ones detailed in this document.
Installation Instructions
-
Firstly make sure you have downloaded and extracted the latest Nochex module files.
-
Open the extracted Nochex Payments module folder
-
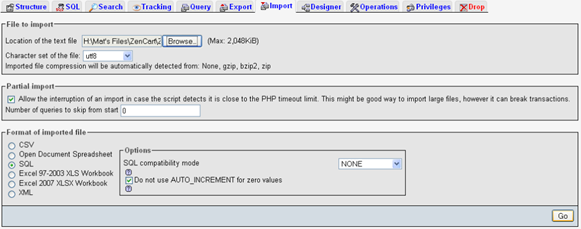
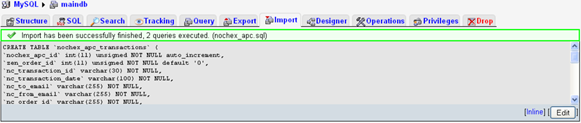
Process the ‘nochex_apc.sql’ file which is included in the selected Zen cart version. This will create two new tables within your database, which are essential in order for the module to run correctly. If you are using phpMyAdmin, use the ‘import’ function on your database.
-
Browse for the ‘nochex_apc.sql’ file, and check SQL has been selected for the format of the imported file.
-
Press Go, which will add the new tables to your database.
-
-
You can also add these tables using the MySQL console, so at the command prompt type:
Mysql –user=username –pass databasename < Nochex_apc.sql -
Once the tables have been successfully added to your database, attach the module files into the corresponding folders in your website files except for database_tables.txt
-
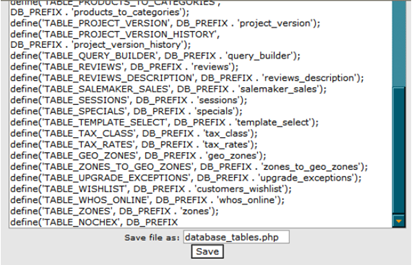
Next, locate and open the database_tables.php file, which can be located somewhere like: mywebsite.com/store/includes/database_tables.php in a text editor, like Notepad or something similar.
-
Open the database_tables.txt and copy the contents of this file.
-
Go to the database_tables.php file; paste the copied contents at the end of this file.
-
Save all changes.
-
Login to your Zen Cart Admin, and locate the Nochex module, which can be found: Modules > Payments.
-
Install the Nochex module.

-
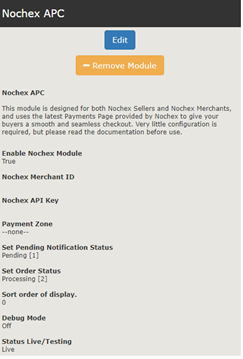
Once Installed, fill in the relevant fields
-
Enable Nochex Module (Required) - Select true to enable the Nochex payment module
-
Nochex Merchant ID (Required) – Enter your register Nochex email address or account alias
-
Nochex API Key- (Required) – Nochex generated API Key, please contact support to get your API key if you do not have one. If you do not have a key you will be defaulted to use the payment page
-
Payment Zone- Leave as none if you want all zones to have same payment options
-
Set Pending Notification Status – Set order status before transaction complete
-
Set Order Status – Set order status one a transaction complete
-
Sort order of display – set the order of where the payment option will be displayed on the checkout (Lowed value is displayed first)
-
Status Live / Testing – This option allows you to test the module without having to make a live transaction.
cautionNote: Make sure the Status is set to live to accept live payments
-
-
Update all changes.
-
Finally go through your checkout process to make sure your module has been installed and setup correctly.