WooCommerce Setup Guide
This is a step by step guide to integrating Nochex Widget API with your WooCommerce website.
Customers are always recommended to back up their code before making any significant changes, such as the ones detailed in this document.
Installation Instructions
-
Firstly, you must have the WooCommerce plugin installed and setup in your WordPress.
-
Download the latest module files from your support email.
-
Log into your WordPress admin.
-
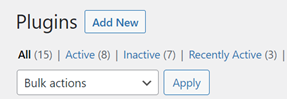
Go to Plugins > Add New.
-
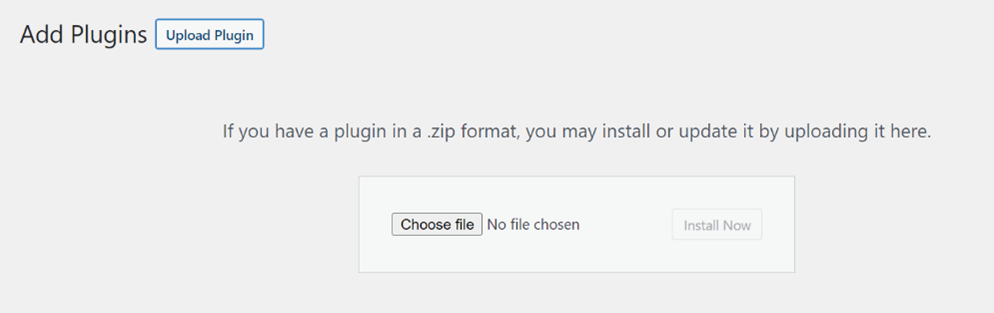
Click Upload Plugin and select Choose file. Find the downloaded Nochex module files and select them. Then click open.
-
Click the Install Now button.
-
Once the install has finished select the Activate Plugin button.
-
Go to WooCommerce > Settings > Payments.
-
Locate the option Nochex API and select manage.
-
Fill in all the necessary details;
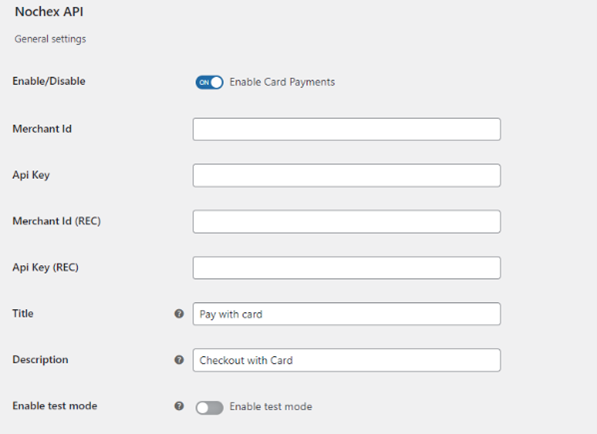
- (Required) Enable box is ticked.
- (Required) Merchant ID has been entered correctly.
- (Required) API Key has been filled in correctly – provided to you by Nochex.
- (Required) Recurring Merchant ID has been entered correctly.
- (Required) Recurring API Key has been filled in correctly – provided to you by Nochex.
-
Click Save Changes.
-
To test the Nochex plugin check the Enable test mode and complete a test transaction by going through the checkout as a customer.
![]()
Always remember to uncheck the Enable Test Mode when you want to start accepting live payments and receive your Nochex Credentials (API key)
Test transactions cannot be performed on recurring payments and will be made live