CopyPay On-page
This secrion outlines everything you need to know about the CopyPay On-page, including a step by step guide to setting up our CopyPay On-page integration to your site.
Walkthrough
-
Create a server to server post with the following required data to get a checkout ID:
- amount
- currency
- payment Type
- Bearer Token
- Entity Id
Below are some code examples:
- PHP
- VB
/* Step 1 */
$responseData = json_decode(requested("https://eu-test.oppwa.com/v1/checkouts","entityId=8ac7a4ca7843f17d017844faa85f0829&amount=1.00¤cy=GBP&paymentType=DB"));
function requested($url, $data) {
$ch = curl_init();
curl_setopt($ch, CURLOPT_URL, $url);
curl_setopt($ch, CURLOPT_HTTPHEADER, array(
'Authorization:Bearer OGFjN2E0Y2E3ODQzZjE3ZDAxNzg0NGY4MTFjNjA4MjR8V2hFMlB4WHdFcA=='));
curl_setopt($ch, CURLOPT_POST, 1);
curl_setopt($ch, CURLOPT_POSTFIELDS, $data);
curl_setopt($ch, CURLOPT_SSL_VERIFYPEER, false);
curl_setopt($ch, CURLOPT_RETURNTRANSFER, true);
$responseData = curl_exec($ch);
if(curl_errno($ch)) {
return curl_error($ch);
}
curl_close($ch);
return $responseData;
}
echo $responseData->id;' Step 1
Public Function Requests() As Dictionary(Of String, Object)
System.Net.ServicePointManager.SecurityProtocol = SecurityProtocolType.Tls12
Dim url As String = "https://eu-test.oppwa.com/v1/checkouts"
Dim data As String = "" +
"entityId=8ac9a4cc783f6ab50178405c46691b25" +
"&amount=1.00" +
"¤cy=GBP" +
"&paymentType=DB"
Dim req As WebRequest = WebRequest.Create(url)
req.Method = "POST"
req.Headers.Add("Authorization", "Bearer OGFjOWE0Yzc3ODNmNWNjOTAxNzgzZmM0MGRhMzBhMGZ8WlluOW5LQ2FZNw==")
req.ContentType = "application/x-www-form-urlencoded"
Dim byteArray As Byte() = Encoding.UTF8.GetBytes(data)
req.ContentLength = byteArray.Length
Dim dataStream As Stream = req.GetRequestStream()
dataStream.Write(byteArray, 0, byteArray.Length)
dataStream.Close()
Dim res As WebResponse = req.GetResponse()
Dim resStream = res.GetResponseStream()
Dim reader As New StreamReader(resStream)
Dim response As String = reader.ReadToEnd()
reader.Close()
resStream.Close()
res.Close()
Dim jss As New System.Web.Script.Serialization.JavaScriptSerializer()
Dim dict As Dictionary(Of String, Object) = jss.Deserialize(Of Dictionary(Of String, Object))(response)
Return dict
End Function -
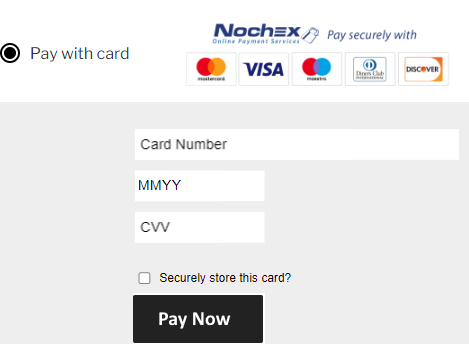
Once you have a checkout ID from Step 1, perhaps on the same page you can proceed to create the payment form on your website with the following; Replace the action url with your success URL and add your checkout id to the script link;
Below are some code examples:
- PHP
- VB
- HTML
<!-- Step 2 -->
<script src="https://eu-test.oppwa.com/v1/paymentWidgets.js?checkoutId=<?php echo $responseData->id;?>"></script>
<form action="https://example.com/success.php" class="paymentWidgets" data-brands="VISA MASTER"></form>
' Step 2
Private Sub form1_Load(sender As Object, e As EventArgs) Handles form1.Load
lblResponse.Text = "<script src=""https://eu-test.oppwa.com/v1/paymentWidgets.js?checkoutId=" & Requests()("id") & """></script> "
End Sub<!-- Step 2 -->
<form id="form1" action="copypayresult.aspx" runat="server" class="paymentWidgets" data-brands="VISA MASTER">
<asp:Label ID="lblResponse" runat="server" Text="Label"></asp:Label>
</form> -
On payment completion your customer will be redirected to a success page, at this point you will need to retrieve the payment status and update your shopping cart / database / etc; To do this you will need to retrieve the ID appended to the success url, for example;
https://mywebsite.com/success?id=A2BC51C222AACBB345B2AF15F22C5B04.uat01-vm-tx03&resourcePath=%2Fv1%2Fcheckouts%2FA2BC51C222AACBB345B2AF15F22C5B04.uat01-vm-tx03%2Fpayment; as well as using your entity id and bearer token from Step 1.- PHP
- VB
- HTML
/* Step 3 */
function request() {
    $url = "https://eu-test.oppwa.com/v1/checkouts/".$_GET["id"]."/payment";
    $url .= "?entityId=8ac9a4cc783f6ab50178405c46691b25";
    $ch = curl_init();
    curl_setopt($ch, CURLOPT_URL, $url);
    curl_setopt($ch, CURLOPT_HTTPHEADER, array('Authorization:Bearer OGFjOWE0Yzc3ODNmNWNjOTAxNzgzZmM0MGRhMzBhMGZ8WlluOW5LQ2FZNw=='));
    curl_setopt($ch, CURLOPT_CUSTOMREQUEST, 'GET');
    curl_setopt($ch, CURLOPT_SSL_VERIFYPEER, false);
    curl_setopt($ch, CURLOPT_RETURNTRANSFER, true);
    $responseData = curl_exec($ch);
    if(curl_errno($ch)) {
        return curl_error($ch);
    }
    curl_close($ch);
    return $responseData;
}

$responseData = json_decode(request());

Echo $responseData->result->code; /* 000.000.000 = live transaction succeeded || 000.100.110 = test transaction succeeded */

Echo $responseData->result->description;
'Step 3
Private Sub form1_Load(sender As Object, e As EventArgs) Handles form1.Load
lblResponse.Text = Requests()("result")("description") & ", " & Requests()("result")("code")
'000.000.000 = live transaction succeeded || 000.100.110 = test transaction succeeded
End Sub
Public Function Requests() As Dictionary(Of String, Object)
System.Net.ServicePointManager.SecurityProtocol = SecurityProtocolType.Tls12
Dim url As String = "https://eu-test.oppwa.com/v1/checkouts/" + Request("id") + "/payment" +
"?entityId=8ac9a4cc783f6ab50178405c46691b25"
Dim req As WebRequest = WebRequest.Create(url)
req.Method = "GET"
req.Headers.Add("Authorization", "Bearer OGFjOWE0Yzc3ODNmNWNjOTAxNzgzZmM0MGRhMzBhMGZ8WlluOW5LQ2FZNw==")
req.ContentType = "application/x-www-form-urlencoded"
Dim res As WebResponse = req.GetResponse()
Dim resStream = res.GetResponseStream()
Dim reader As New StreamReader(resStream)
Dim response As String = reader.ReadToEnd()
reader.Close()
resStream.Close()
res.Close()
Dim jss As New System.Web.Script.Serialization.JavaScriptSerializer()
Dim dict As Dictionary(Of String, Object) = jss.Deserialize(Of Dictionary(Of String, Object))(response)
Return dict
End Function<!-- Step 3 -->
<form id="form1" runat="server">
<asp:Label ID="lblResponse" runat="server" Text="Label"></asp:Label>
</form>
A full list of parameters that can be used in each step can be found later on this page - see Parameters.
When you have your API setup and ready to accept live transactions, remember to update the following URLs from: https://eu-test.oppwa.com/ to https://eu-prod.oppwa.com/ and update your API bearer token and entity ID provided by Nochex.
Card Customisation
To customise the appearance of the payment form, include customer data on the transaction, and add Nochex Terms to your payment form; add the following styles and script to your card checkout from Step 2 of the previous section;
<style>
.wpwl-form-card {
   background-color:#0088cc;
   border-color:#0088cc;
}
.wpwl-button-pay {
    background-color:#ffffff;
    color:#0088cc;
     border-color:#ffffff;
}
.wpwl-button-pay:hover{
   background-color: #0088cc;
   color:#ffffff;
   border-color:#ffffff;
}
.wpwl-label, .wpwl-hint, .wpwl-button-error[disabled], .wpwl-text-billing, .customLabel, .editbilling {
   color:#ffffff!important;
}
</style>
<!-- To customise the appearance of the payment form, include customer data on the transaction, and add Nochex Terms to your payment form; add the following styles and script to your card checkout from 1. Setup API - Step 2; -->

<!-- full customisation example -->
<script>
    function validateHolder(e) {
        var holder = $('.wpwl-control-cardHolder').val();
        if (holder.trim().length < 2) {
            $('.wpwl-control-cardHolder').addClass('wpwl-has-error').after('<div class="wpwl-hint wpwl-hint-cardHolderError">Invalid card holder</div>');
            return false;
        }
        return true;
    }
    var wpwlOptions = {
      billingAddress: {
        country: "GB",
        state: "West Yorkshire",
        city: "<?php echo $_POST["city"]; ?>",
        postcode: "<?php echo $_POST["postcode"]; ?>",
        street1: "<?php echo $_POST["street"]; ?>"
        },
            onReady: function() {
                $('.wpwl-label-brand').html('Card Brand');
                $('.wpwl-form-card').find('.wpwl-button-pay').on('click', function (e) {
                    validateHolder(e);
                });
                var customerDetails = '<div class="wpwl-wrapper wpwl-wrapper-custom" style="display:inline-block">' +
                ' First Name:  <input type="text" name="customer.givenName" value="<?php echo $_POST["firstname"]; ?>" />' +
                ' Last Name:  <input type="text" name="customer.surname" value="<?php echo $_POST["lastname"]; ?> " />' +
                ' Email:  <input type="email" name="customer.email" value="<?php echo $_POST["email"]; ?> " />' +
                 '</div>';
                $('form.wpwl-form-card').find('.wpwl-button').before(customerDetails);
                var termsHtml = '<div class="customLabel" style="display:inline-block;color:yellow!important"> Total Amount: <?php echo number_format($price, 2) ?> GBP</div><div class="customLabel"> Agree to <a href="https://secure.nochex.com/help_messages.aspx?Action=Q&ID=296" style="color:orange" target="_blank">Nochex Terms and Conditions</a> <input type="checkbox" id="customer.terms" required /></div>';
                $('form.wpwl-form-card').find('.wpwl-button').before(termsHtml);
            },
            onBeforeSubmitCard: function (e) {
                return validateHolder(e);
            },
    }
</script>
Tokenisation
Tokenisation is a method which allows you to store customer's payment details, and allow them to be re-used in later purchases. To begin with you will need to make adjustments to your API.
-
Firstly, update your server to server post to include the following variable: createRegistration=true
/* Step 1 */
$responseData = json_decode(requested("https://eu-test.oppwa.com/v1/checkouts","entityId=8ac7a4ca7843f17d017844faa85f0829&amount=".$_POST["price"]."¤cy=GBP&paymentType=DB&createRegistration=true"));
function requested($url, $data) {
$ch = curl_init();
curl_setopt($ch, CURLOPT_URL, $url);
curl_setopt($ch, CURLOPT_HTTPHEADER, array(
'Authorization:Bearer OGFjN2E0Y2E3ODQzZjE3ZDAxNzg0NGY4MTFjNjA4MjR8V2hFMlB4WHdFcA=='));
curl_setopt($ch, CURLOPT_POST, 1);
curl_setopt($ch, CURLOPT_POSTFIELDS, $data);
curl_setopt($ch, CURLOPT_SSL_VERIFYPEER, false);
curl_setopt($ch, CURLOPT_RETURNTRANSFER, true);
$responseData = curl_exec($ch);
if(curl_errno($ch)) {
return curl_error($ch);
}
curl_close($ch);
return $responseData;
}
echo $responseData->id; /*checkout id*/ -
Update your payment completion page to retrieve and save the registrationId (which you will need, into your database) for when the customer makes future transactions on your website.
-
Your server to server post will need to be updated again to send your customer registrationId on creation of the checkout as shown in the example;
/* Step 3 */
$responseData = json_decode(requested("https://eu-test.oppwa.com/v1/checkouts","entityId=8ac7a4ca7843f17d017844faa85f0829&amount=".$_POST["price"]."&paymentType=DB¤cy=GBP®istrations[0].id=8ac7a49f7864f6370178653040882b59&createRegistration=true"));
Parameters
Step 1
| Parameter Name | Required? | Description |
|---|---|---|
Bearer | Yes | Bearer Token is a required field and will be provided by Nochex to be used to authorise requests |
EntityId | Yes | Entity ID is a required field and will be provided by Nochex to be used to authorise requests |
Amount | Yes | The amount a customer will pay |
Currency | Yes | The currency a customer will pay in e.g. GBP |
PaymentType | Yes | The payment type for the request. DB - debit the account of customer and credit your account |
CreateRegistration | No | This is used if you are going to save and use tokenisation for your customers |
Registrations[n] | No | This is used in relation to the tokenisation ids saved for a customer |
Step 2
| Parameter Name | Required? | Description |
|---|---|---|
Customer.givenName | Yes | First name of given name of the customer |
Customer.surname | Yes | Last name or surname of the customer |
Customer.email | Yes | Email address of the customer |
Customer.phone | Yes | Phone number of the customer |
Billing.street1 | Yes | 1st line of the customers billing address |
Billing.city | Yes | City of the customers billing address |
Billing.state | No | County / state or region of the customers billing address |
Billing.postcode | Yes | Postcode of the customers billing address |
Billing.country | No | Country of the customers billing address |
Step 3
| Parameter Name | Required? | Description |
|---|---|---|
Bearer | Yes | Bearer Token is a required field and will be provided by Nochex to be used to authorise requests |
EntityId | Yes | Entity ID is a required field and will be provided by Nochex to be used to authorise requests |
Id | Yes | This is required in order to retrieve the payment status and details |
Resourcepath | No | The resource path can be used in replacement of the id and url path to retrieve the payment status and details |
Response Codes
Transaction Response
000.000.000- Live Transaction Successful000.100.110- Test Transaction Successul200.300.404- Missing Entity ID or mixing of test - https://eu-test.oppwa.com/v1/checkouts and live - https://eu-prod.oppwa.com/v1/checkouts URLs800.120.100- Rejected by throttling - too many calls made in a period of time
Checkout Response
000.200.100- Checkout successfully created200.300.404- Missing Entity ID or mixing of test - https://eu-test.oppwa.com/v1/checkouts and live - https://eu-prod.oppwa.com/v1/checkouts URLs800.900.300- Missing Bearer TokenvalidatePciIframes/validateHolder- Missing card holder information